Wireless Inventory - Physical Count
Location - Serial inventory\ Wireless Inventory\ Physical Count
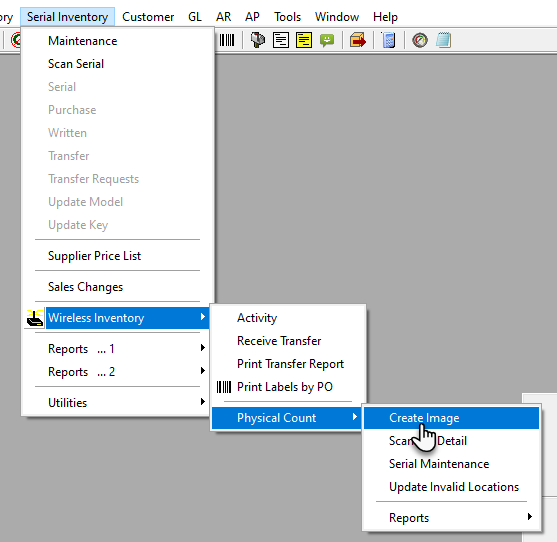
Create Image
The first step before doing a physical inventory is to create an image of your inventory. This image will be used by EPASS to compare what you scanned with what was actually in your warehouse or store. Typically, the reconciliation process does not start until there is movement in your inventory again, and that is why we do our comparison against your inventory as it was when it was scanned. It is very important to Create the Image after all receiving and shipping has been completed.
If this is your first time doing a physical inventory in EPASS, then after clicking on the Create Image option in the menu you will just see an hourglass for up to 1-2 minutes while the image is created. If this is not your first time doing a physical inventory in EPASS, then you will see the following prompts:

Click Yes on the first prompt to clear out what you had scanned on your previous physical inventory. If you had already started scanning and for some reason needed to recreate the image, then you could click No to retain what had been scanned, but create a new image.

This is just a final warning that your previous image will be replaced by a new one.
Scanning Inventory
If you are using the EPASS WMS system and scanners, follow the instructions for performing a model physical count in the WMS User's Guide.
Click here if you are using the Worth Data scanners
Now it is time to start scanning. Pick up your scanner, turn it on, and sign in (if necessary). Press the number 8 on the keypad (8. Physical Count) and then press Enter. You will see the following screen:

Pressing the right arrow (->) key on the keypad will display all of your locations, or if you know the location then simply punch it in on the keypad and press Enter. If you are scanning Main Stock, you can either type ‘MAIN’ or leave it blank and just press Enter. Next, you should see the following screen:

If you use Bin Locations to further categorize where your product is within a location (bar-coding your shelves, separating your floor/warehouse into quadrants) then you need to scan the Bin Location that you are working on before scanning the product within it. Press the right arrow (>) on the keypad to enter the Bin Location, and you will see the following menu:

Scan the Bin, or type it in on the keypad and press Enter, and that will set the current Bin Location that you are scanning. Once you are finished scanning that Bin Location, just follow the same steps to change to the next Bin Location, or if you are no longer working in a Bin Location just leave it blank and hit Enter at the Scan Bin prompt. All product that is scanned while you have a Bin Location set will be moved into that Bin Location, so make sure that it is correct at all times.
Now, start scanning your product in this location. If you are scanning multiple locations, then once you are finished with this location just hit the left arrow key on the scanner to go Back, enter the next location, and start scanning.
If you find any product that does not have a label on it, you should write down the model and serial number, and print a new label immediately before you continue scanning. Product without a label is a primary cause of invalid quantities, because it is too easy just to ignore that piece for now, and then forget about it later.
If you have any product with an older style label (model barcode and serial barcode), and the model number or the serial number are not in the system at all, you will be given the option to Retry or Continue. If you Retry it will just prompt you for another barcode to scan, but if you Continue it will be added to the Physical Analysis report (to be discussed later) as an Unknown piece.
If you scanned something that you did not intend to scan, you can press the up arrow key to delete the last product scanned. You will see the following:

If you really want to delete this product, press the right arrow key on the scanner to Delete. If you do not want to delete it, press the left arrow key to cancel and go back. Whichever option you choose, you will be taken back to the Scan Barcode menu and you can continue scanning.
Physical Analysis Report
Once all of the product has been scanned it is time to analyze what was scanned, and what was not scanned. The first step would be to run the Physical Analysis report to see the inventory problems.
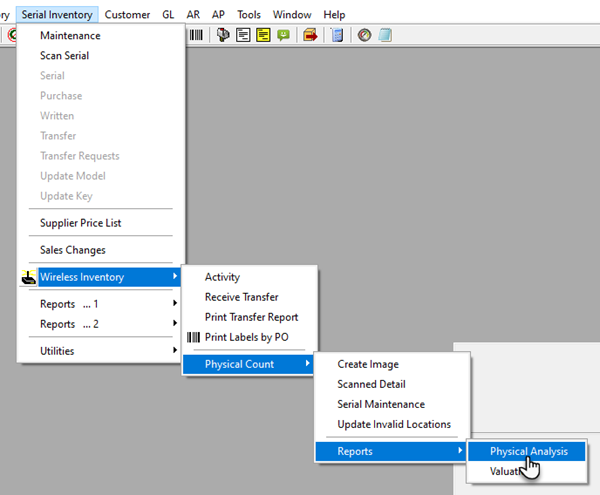
You will see the following options when running the Physical Analysis Report:
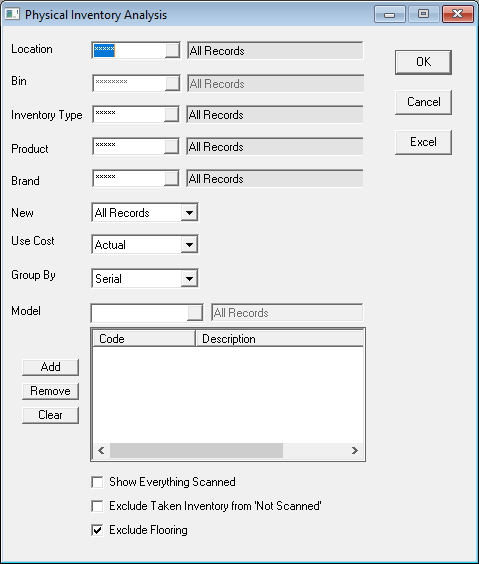
The easiest way to reconcile from this report would be to run it once for each location that you scanned. This way if anyone has to physically go to a location to look for a serial number, it is easier to hand them one report to check them all at the same time.

When resolving the issues in your inventory, you will be creating an Invoice to sell or return product to yourself (the company). It is also possible that Invoices will be created to exchange serial numbers for customers. These Invoices will be referred to in the explanation of the Physical Analysis report status’s below.
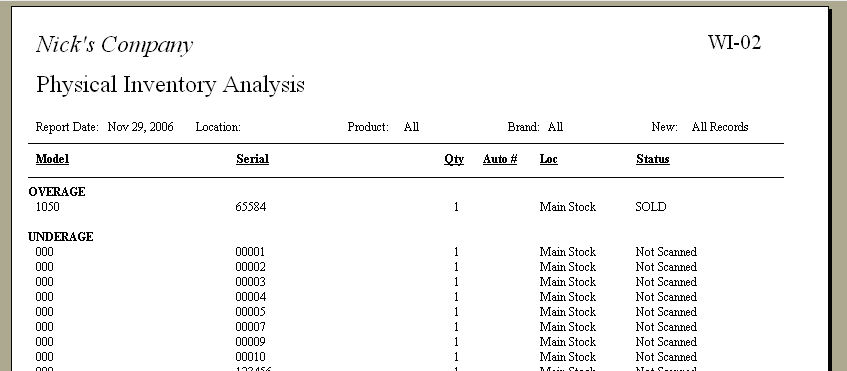
There are three sections to the Physical Analysis report; the Overage section, the Underage section, and the Unknown section.
The Overage section is comprised mostly of serial numbers that the system thinks should not have been scanned. The following Status’s are possible within the Overage section:
Sold - These are serial numbers that the system shows as ‘Sold’ but they were scanned during your inventory. Typically this is because a serial number was manually shipped on an invoice, and the wrong serial number was selected. To resolve this, you should first do a Scan Serial to find what customer this serial number was sold to, and then create an Invoice for that customer to return the Sold serial number and sell them the correct one. Hopefully there is a serial number for this model in the Underage section, in which case you could assume that is the one that should have been shipped. If not, then the serial number that is brought back into inventory on the customers invoice, in turn needs to be sold to the company as a loss.
Duplicate Entry - These are serial numbers that were scanned twice. It is possible that someone actually scanned one box two times, but it is also possible that there are two boxes with the same label. In either case you will want to refer to the Scanned Detail form (see Section 4 below) to determine how to approach this situation.
Returned to Mfg - These are serial numbers that were sent back to the manufacturer on a purchase order. If you are just waiting for it to actually be returned then you can ignore it, but if you want this piece to be available for sale then the only way to put it back in inventory is to delete it from the negative purchase order.
Invalid Location - The vast majority of serial numbers that are in the wrong location in the system will be updated immediately when they are scanned. There are occasionally some that are not updated (mainly due to locked Models) and these need to be manually updated to the correct location. Refer to the Physical Inventory Serial Maintenance section (Section 5 below) to see how you can update actual inventory and the inventory image at the same time.
The Underage section is comprised of all serial numbers that are available in the system, but were not scanned. Hopefully some of these are either cancelled out by Sold serial numbers, or are found hiding in a corner somewhere, because the ones that are not found should eventually be sold to the company as a loss. See section 6 below on how to move all ‘Not Scanned’ inventory into a temporary location to be analyzed before it is sold to the company.
The Unknown section is strictly product that doesn’t exist in the system at all. It will only appear on this report if the operator of the scanner either manually keyed a model number and serial number (and chose to override the warning that it is invalid), or they scanned a model number barcode and serial number barcode (and chose to override the warning that it is invalid). If one of the pieces listed here closely matches something that is listed in the Underage section, then it is possible that it was mistyped, and can manually be updated in the Scanned Detail form (Section 4).
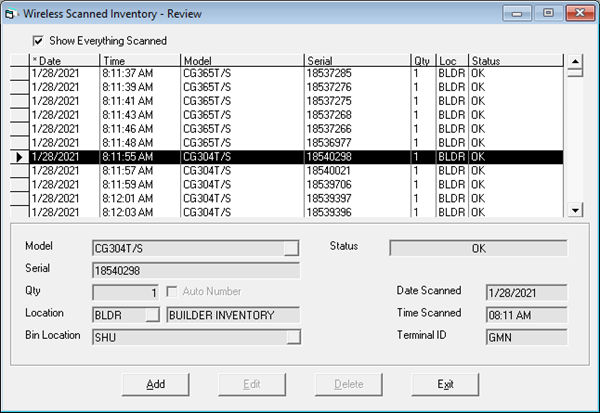
Scanned Detail
The Scanned Detail form is very useful for fixing product that appears in the Unknown section of the Physical Analysis report, or for looking at the chronological order that product was scanned.

What is displayed on this form is what was actually scanned or keyed in on the scanner. If something was keyed in wrong, it would show up in this list as an Invalid Model. You could actually edit what was input and re-run the Physical Analysis report so that it will be properly reflected. You will also see any Duplicate Entries on this form, and if you check the ‘Show Everything Scanned’ box, then it will make it easier to determine if an employee simply scanned the same box twice. Typically, if a person did scan the same box twice it would be within a very close period of time and you would see the same model/serial number closely together in this list.
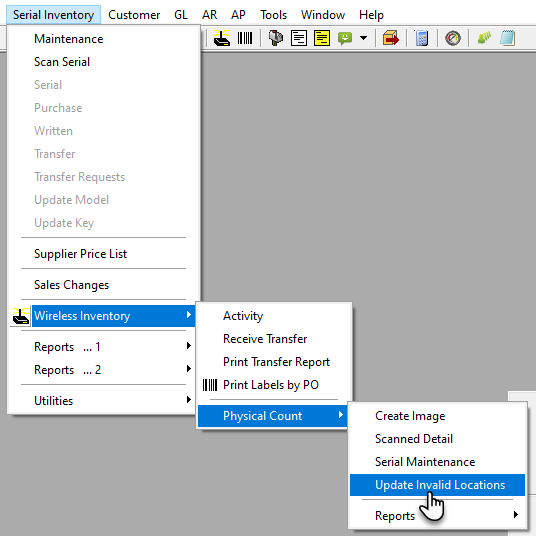
Serial Maintenance (Image)
Physical Count - Serial Maintenance is used to update actual inventory and the inventory image at the same time.
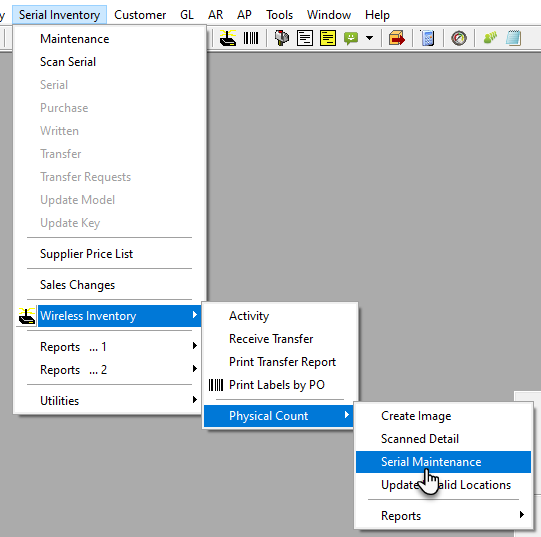
Physical Inventory Serial Maintenance takes you into the exact same form as regular Serial Inventory would, except that anything done from this form updates the image as well. You can tell if it is going to update both, if the Title Bar of the form you are in says “Physical Inventory” at the beginning, like the following:
![]()
If you wanted to transfer a serial number in both the image and regular inventory, you would just search for the model like normal and then select the Transfer option from the regular Serial Inventory menu. The Transfer form will say “Physical Inventory” at the beginning, just like the Serial Maintenance form did.

It is useful to update both the image and regular inventory when you want to correct something, and you also plan on running the Physical Analysis again and you want the change to be reflected in that report.
Update Invalid Locations
The Update Invalid Locations Utility is used to move all ‘Not Scanned’ inventory into an ‘Invalid’ or ‘Temporary’ location to be dealt with before deciding to sell it to the company on an invoice. This is useful if you want to more thoroughly search for the product before finally writing it off.
Model records with an Invalid location status on the Physical Analysis Report does not get moved when running Update Invalid Locations. Only records with the Not Scanned report status gets moved over to a specified location
If you decide to run this utility it is very import to only run it for the locations that you scanned. If you scanned the entire inventory, then it is safe to select All Records, but if you only scanned certain locations then it should be run one time per location.

See Also
November 05, 2024